

Knowing what else to replace with an AC compressor is the difference between a repair that holds and one that comes back in six weeks. A compressor is the most expensive part in a truck air conditioning system, and it is the one most often replaced twice. That second failure is rarely the compressor’s fault. It happens because the system it was fitted into was never properly cleaned up after the first one.
The list is short, most of it is inexpensive, and skipping any of it is what voids the warranty on the part you just paid the most for.
This guide covers the five parts that go with a new compressor, the two steps most repairs skip, and how the list changes depending on how the old compressor actually failed.
Why the Compressor Is Never Replaced Alone
When a compressor wears out quietly, it stops building pressure, and that is the end of it. When one comes apart internally, it does something else entirely: it sends metal particles and contaminated oil through every line, through the condenser, through the expansion valve, and into the evaporator.
That debris does not leave on its own. Install a new truck AC compressor into that system, and it swallows the remains of the old one. Within weeks, the new unit is scored, starved of oil, or blocked.
The second problem is lubrication. Refrigerant oil circulates with the refrigerant, so a large share of the system’s oil is sitting in the lines, the condenser, and the accumulator or drier when the old compressor comes off. Fit a new compressor without accounting for that, and it runs short of oil from the first minute.
Both problems are solved by the same short list.
What Else to Replace With an AC Compressor: The Five Parts
1. The Receiver Drier or Accumulator
This is the one that is never optional. The drier holds a desiccant that pulls moisture out of the refrigerant, and it filters debris before anything reaches the metering device. After a compressor failure, it is holding whatever the compressor shed.
It also has a second problem. The moment the system is opened, the desiccant starts absorbing moisture from the air instead of from the refrigerant, and desiccant does not recover once it is saturated. Even on a clean job, the old AC drier is spent as soon as the circuit is opened.
Systems that use a thermal expansion valve have a receiver drier on the high side. Systems that use an orifice tube have an accumulator on the low side. Either way, it gets replaced.
2. The Expansion Valve or Orifice Tube
The metering device is the first real restriction downstream of the compressor, which makes it the place debris collects. A partially blocked valve produces the same complaint as a failing compressor, so a truck can come back warm with a brand-new compressor fitted correctly.
An orifice tube is cheap and almost always replaced. An AC expansion valve costs more, which is why it gets reused, and why the same truck often comes back.
The honest rule is this. If the old compressor turned freely and simply stopped building pressure, inspecting the valve may be enough. If it seized or came apart, replace it and do not spend time deciding.
3. Every O-Ring You Disturb
O-rings harden with heat and age, and once they have been unseated, they do not reseal reliably. A new compressor on old seals is a slow leak, and a slow leak means a low charge, and a low charge means the new compressor runs short of oil.
Use new O-rings rated for the refrigerant in the system, lubricate them with refrigerant oil rather than anything else, and replace every one you break loose rather than only the ones that look tired.
4. The Right Volume of Compressor Oil
This is where most of the guesswork happens, and it is worth being precise.
A new compressor does not always arrive with the correct charge. Some ship dry, some ship with a full system charge, and some ship with a partial one. Before fitting, drain the new unit and measure what comes out, then drain the old one and measure that too. The difference tells you how much oil stayed behind in the rest of the system.
Use the compressor oil type and viscosity the system calls for. PAG grades are not interchangeable, and the wrong viscosity gives you either poor lubrication or poor heat transfer. Check the under-hood label and the compressor specification rather than assuming.
5. The Condenser, in One Specific Case
This one surprises people, and it is the single most expensive thing to get wrong.
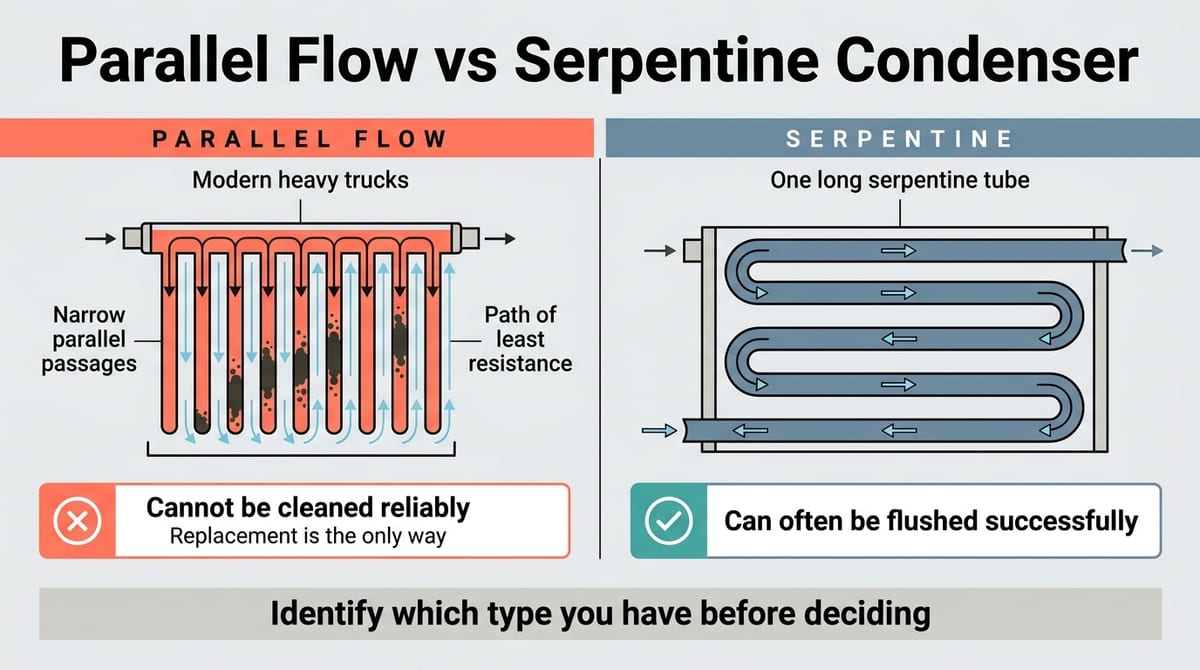
Most AC condensers on modern heavy trucks are parallel flow designs. The refrigerant travels through many narrow parallel passages rather than one long serpentine tube, which is excellent for heat transfer and very poor for flushing. Solvent takes the path of least resistance through the clear passages and leaves the blocked ones exactly as they were.
So after a catastrophic compressor failure, a parallel flow condenser usually cannot be cleaned reliably. Replacement is the only way to be confident the debris is out of it. A serpentine condenser can often be flushed successfully.
Identify which type you have before deciding, because flushing a parallel flow condenser and calling it clean is how the new compressor gets contaminated a second time.
Related Reading : 8 Causes of a Semi Truck AC Blowing Warm Air
The Two Steps Most Repairs Skip
Flushing the System
Lines, the evaporator, and a serpentine condenser can be flushed to remove debris and the old oil carrying it. The compressor itself, the drier, the accumulator, and the metering device cannot be flushed and are not meant to be, which is part of why they are replacement items rather than serviceable ones.
Flush each component individually rather than pushing solvent through the assembled system, because a blockage in one part will simply divert the flow around it. Work in the normal direction of refrigerant flow, and keep going until what comes out the far end runs clean.
The step that gets forgotten is drying. Any solvent left in a line will contaminate the new oil charge and attack the desiccant in the new drier, so every flushed component needs dry nitrogen or clean shop air run through it until no solvent remains. If you cannot be confident a part is dry, replace it instead.
How far down this road you need to go depends entirely on how the compressor failed, which is covered in the next section.
Pulling a Vacuum
Evacuating the system is what removes the moisture that got in while it was open, and it is not a step to rush. A short vacuum drops the pressure without giving moisture time to boil off and leave with it, which is why a system can be charged, sealed, and still be carrying water.
Pull a sustained vacuum rather than a quick one, then close the valves and hold it. If the reading climbs, the system is not tight and charging it will only waste refrigerant. If it holds, the system is both dry and sealed, and the charge can go in.
Wear Failure or Catastrophic Failure: The List Changes
This distinction decides how much of the system you touch, and almost no guide makes it.
Wear failure. The compressor still turns by hand, the clutch is intact, there is no metal in the oil, and the gauges simply show it is no longer building pressure. Contamination is minimal. Replace the compressor, the drier, the O-rings, set the oil, inspect the metering device, and pull a vacuum.
Catastrophic failure. The compressor is seized, noisy, or has visibly come apart. The oil that drains out is grey or has glitter in it. Now debris is through the whole circuit. Replace the compressor, the drier, the metering device, and the O-rings; flush the AC lines and the evaporator; and replace the condenser if it is a parallel flow unit.
Drain the old compressor’s oil into a clean container and look at it before deciding anything else. That one check tells you which of these two jobs you are doing, and it takes a minute.
There is a middle case worth naming. A compressor that locked up but stayed sealed, with clean oil and an intact clutch, sits between the two. Treat it as catastrophic until the oil says otherwise, because the cost of guessing wrong falls entirely on the new compressor.
While the system is open, it is also worth checking the AC switch, since a switch that has been cycling a failing compressor hard may not be in good shape either.
Do Not Overlook the Clutch and the Belt
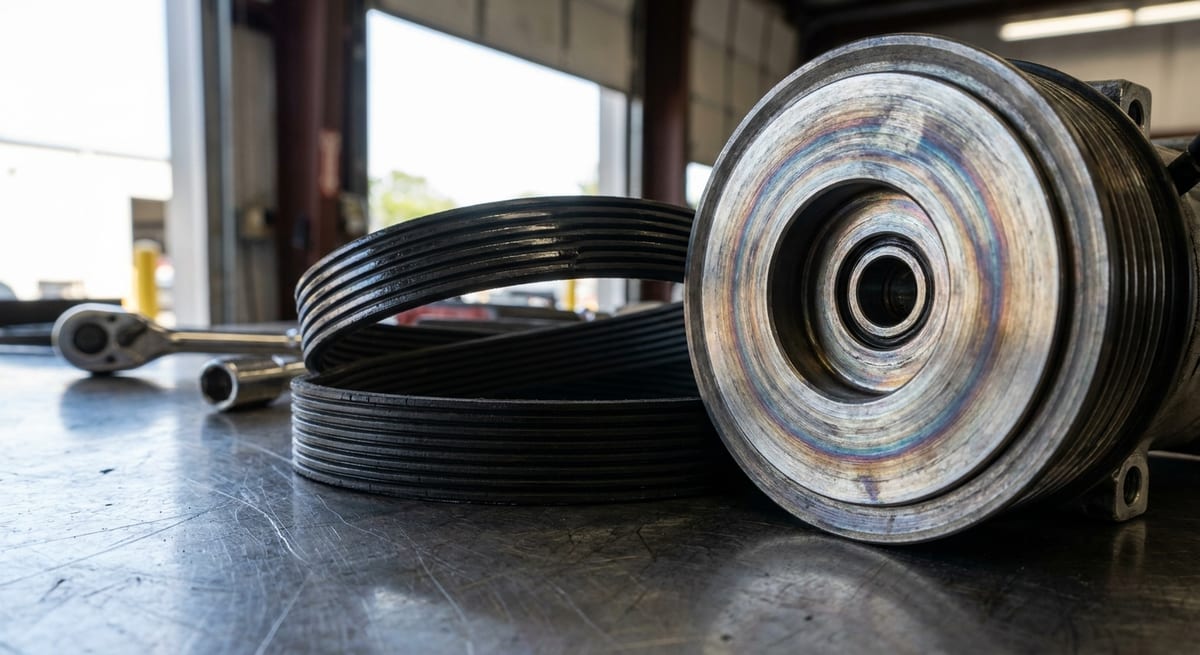
A compressor that seized has usually been fighting the belt for a while before it stopped. Check the belt for glazing and the tensioner for wear, because a worn tensioner will let the new compressor slip, run hot, and fail early.
If the replacement comes as a bare compressor rather than a complete unit, confirm the clutch pulley diameter, the groove count, and the coil voltage against the old one. These vary within the same compressor family, and a pulley that is close but not identical will misalign the belt.
How Warranty Claims Get Denied
Compressor manufacturers and distributors write drier replacement into their warranty conditions, and in most cases the metering device as well. The reasoning is straightforward: they have no way to tell whether a returned compressor failed from a defect or because it was installed into a contaminated system, so they require the parts that prove the system was cleaned up.
If you cannot show the drier was replaced, the claim is yours to absorb. Keep the receipts for the drier and the metering device with the compressor paperwork.
In practical terms, the drier is not an upsell. It is the condition on which the expensive part stays covered.
What to Confirm Before You Order
Compressors and the parts that go with them are specific to the truck and the system. Before ordering:
Find the part number on the old compressor, usually on a label or stamped into the body
Confirm the clutch pulley diameter and groove count, since these vary within the same compressor family
Have the VIN available, because it confirms the build rather than the model year alone
Check whether the truck uses an expansion valve or an orifice tube, as the two are not interchangeable
Identify the condenser type, parallel flow or serpentine, before deciding whether it can be flushed
Confirm the oil type and volume the compressor requires
Order the drier and the O-rings in the same order, since both are needed once the system is open
Quick Fit Parts lists AC components by truck make, and the VIN search will match parts to your specific build. Same-day pickup and fast delivery are available on stocked items, which matters when a truck is down for a part that costs a fraction of the compressor.
Related Reading : How to Repair a Truck Radiator: Diagnose, Fix, or Replace
Frequently Asked Questions
What else needs to be replaced with an AC compressor?
At minimum, the receiver drier or accumulator, every O-ring that was disturbed, and the correct volume of refrigerant oil. After a catastrophic failure, add the expansion valve or orifice tube, a system flush, and the condenser if it is a parallel flow unit.
Can I replace just the compressor?
Only if the old one failed by wear with no contamination, and even then the drier still has to go because it absorbs moisture the moment the system is opened. After any internal failure, replacing the compressor alone is how the new one gets destroyed.
Do I have to replace the expansion valve every time?
No. After a normal wear failure, it can often be inspected and reused. After a failure that put metal into the system, replace it, because it is the first restriction debris reaches.
Why does the drier have to be replaced?
It holds a desiccant with a finite capacity that starts absorbing moisture from the air as soon as the circuit is open, and it filters the debris the old compressor shed. Neither condition is reversible in the field.
Can a parallel flow condenser be flushed?
Not reliably. The solvent travels through the open passages and leaves blocked ones untouched. After a catastrophic compressor failure, a parallel flow condenser is normally replaced rather than flushed.
How much oil goes into a new compressor?
It depends on the system and on how much oil stayed behind in the rest of it. Drain and measure both the new compressor and the old one, then set the charge to the specification for that truck. Do not assume the new unit arrived with the right amount.
Will my compressor warranty be denied if I skip the drier?
In most cases, yes. Manufacturers and distributors write drier replacement into their warranty terms, and often the metering device as well. Keep the receipts with the compressor paperwork.
How do I know whether the failure was wear or catastrophic?
Drain the old compressor’s oil into a clean container and look at it. Clean oil and a shaft that still turns by hand point to wear. Grey oil, metal glitter, or a seized shaft means debris is through the system, and the longer list applies.

Write A Comment